 |
|
|
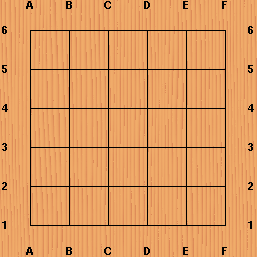
| Play starts on an empty board, which is a square grid of horizontal and vertical lines. This is a small one with 6x6 lines forming 36 intersections, or points. The standard size is 19x19, while 9x9 is ideally suited to beginners. The object of the game is to conquer a majority of the points on the board, either by occupying or enclosing them. |
|
|
||
| The two players, Black and White, alternate in placing a stone of their color on an empty intersection. Black moves first. Stones cannot be moved, but can be captured. The unit of capture is a string: a group of stones of one color that are connected along the board lines. A string is captured when it has no more adjacent empty points, or liberties. Above we see two single-stone strings with 4 liberties each. Note that diagonal points are not adjacent. | Black 3 extends her string while taking a liberty away from the white string. White 4 is played symmetrically to restore the balance of liberties at 4 each. Each player has now staked out roughly half of the board. |
|
|
||
| Black 5 is played at the head of White's 2 stones, to find its progress blocked by White 6. | Black 7 allows White 8 to cut off the lonely stone at C2. This stone is said to be in atari, meaning it has only one liberty and is in danger of being captured on the next move. Running away to C1 would only invite white to play at B1, leaving Black no way to get out of atari. |
|
|
||
| Instead Black 9 counter-atari's White, who regains a liberty by capturing the black stone with White 10. | After yet another atari at Black 11, White 12 wisely connects. |
|
|
||
| With two cutting points at B5 and D5, Black decides to defend one of them. White 14 is a solid extension into the biggest open space. | After Black 15, White pushes in at 16 before blocking at 18. |
|
|
||
| Black 19 seeks to minimize White's area on the left, leaving White to capture a black stone with 20. | The blocking move Black 21 turns into a sacrifice as White 22 compels Black to connect her stones together with Black 23. |
|
|
||
| After White 24 captures, Black plays 25 smack into the middle of White's group. This may not make much sense, until one realizes that a White move at 25 would create 2 permanent liberties, or eyes, at D1 and F1, that Black could never occupy... | The throw-in of White 26 similarly prepares to prevent Black from making 2 eyes. |
|
|
||
| Black 27 saves A2, but after reducing Black on the top as well, White similarly succeeds in limiting Black to one eye. | Black 31 shows that capture of the opponent takes precedence over self capture; the captured white stone provides the liberty Black needs to stay on the board. White would now like to capture back at D6. This would however recreate the position in the left diagram, and thus lead to a neverending cycle of capturing back and forth. This is called a ko situation, and is resolved by the superko rule, that forbids any move recreating an earlier whole-board position. White 32 is a ko threat; after the defense at Black 33... |
|
|
||
| White is allowed to recapture in the ko. Black 35 takes another internal liberty of White who has ample time to connect her stones with White 36. | After Black 37, both sides connect. White's atari at 40 gives an almost symmetrical situation. |
|
|
||
| Fortunately for Black, she gets to capture first in the remaining ko, forcing White to capture 2 stones. After the atari at 43, | White can recapture in the ko, and we get a sense of deja-vu. |
|
|
||
| But now when Black recaptures the ko, White is lost, since the capture at 48 leaves her in atari still... | Allowing Black to capture the lot. Realizing the futility of playing stones which Black can easily capture, White passes. Black spends another move to capture the last White stone, and both sides pass in succession, signalling the end of the game. |
|
|
||
| After 2 consecutive passes, the game is scored. Black has 18 points occupied and 18 points enclosed for a total of 36 points, leaving White nothing:( | Had Black ignored the ko-threat to win the upper-right ko at move 33, the game would end more peacefully. The players could just agree to remove the dead stones at A6 and E1 before scoring, resulting in a 20-16 win to Black. |
Hope you enjoyed this game! One may consult
The Logical Rules
as a concise rules reference, using the comments to link to the
above terminology.